

I hope this tutorial is super easy to follow. I've included lots of pictures. Be sure to read the entire tutorial prior to starting. (can you tell I'm a teacher?)
What you'll need (for a set of six):

-6 (pre-washed and pressed!) fat quarters of various coordinating fabric. You can also use 3 half-yards of three fabrics
-3 packages of medium rick rack. Each package has 2.5 yards, so get three to be safe.
-thread (thread colors should match your rick rack)
-sewing machine
-scissors/rotary cutter
-ruler
-iron
-iron
-optional: cutting mat
Get it all ready:
1. Cut your six fat quarters into 17 inch squares.


2. Measure rick rack into 17.5 inch strips. You will need 12 of them.
3. Pair up your napkins with rick rack. I usually buy different colors of rick rack and match them up with each square of fabric and set them together.


Let's sew:
1. Pin each strip of rick rack on opposite sides of each square. I usually eyeball it and pin it about 2.5 inches from the edge of the square, making sure it's parallel to the edge of the fabric. I prefer to do each step to each napkin, like an assembly line. It seems faster to me.


2. Make sure your top thread matches the color of your rick rack. I always have white thread in my bobbin and change the top to match. Sew all twelve rick rack strips to your napkins, no need to backstitch.


3. Press rick rack and napkin. Trim any rick rack that hangs off the edge of your fabric.


4. Now that the rick rack is attached, it's time to hem your napkins. Almost done!
5. Press/iron all four edges of your napkin 1/4 inch. At this point I go to my machine (without pinning) and hem. I fold the raw edge over as I go, taking care as I sew over the rick rack. If you aren't so steady, I would suggest ironing your 1/4 inch fold over one more time, pinning, and hemming. Hem all six napkins and press! I fold mine into thirds.


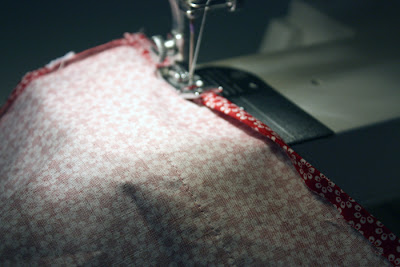


Helpful Hint: rick rack and corners can be tricky. I usually slow down and help my machine go through the rick rack by pulling the napkin a little as it goes through. When you reach the corner, make sure your needle is down in the fabric, raise the presser foot, and rotate your napkin before lowering the foot to continue.
If you have any questions, please leave a comment and I will respond directly to you or update the tutorial. Feel free to link up your napkins in the comment section as well.


3 comments:
Let me know if/when you want to do a video version of a tutorial you're working on. I'll hook you up!
These are amazing! So cute!
Thanks for the great tutorial. Love how rik rak just makes these so cute! Can't wait to make some for Christmas gifts this year ;0
Post a Comment